User Interface
Finally, we made it to the final stop of this milestone–building a user interface!
Since building a front-end app is not the main goal of this book, I won’t show how to build such an app from scratch. Instead, I’ll show how to use MetaMask to interact with smart contracts.
If you want to experiment with the app and run it locally, you can fund it in the ui folder in the code repo. This is a simple React app, to run it locally set contract addresses in
App.jsand runyarn start.
Overview of Tools
What is MetaMask?
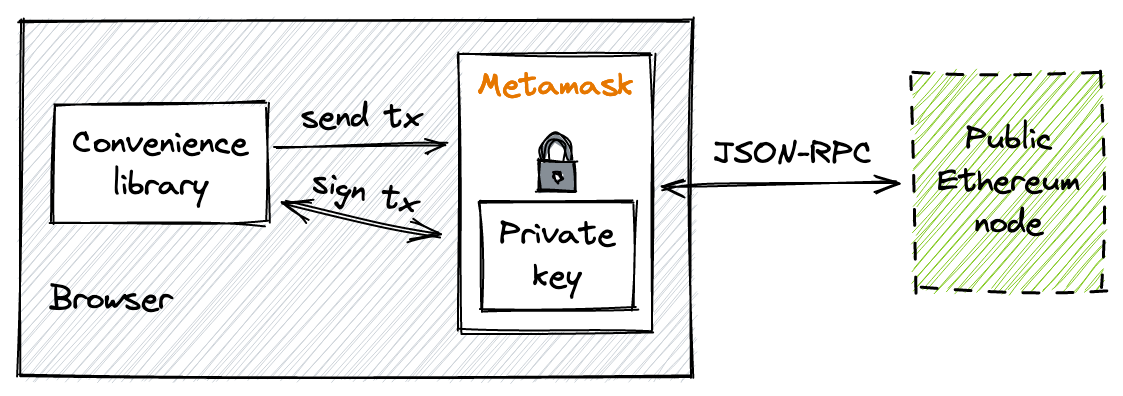
MetaMask is an Ethereum wallet implemented as a browser extension. It creates and stores private keys, shows token balances, allows to connect to different networks, and sends and receives ether and tokens–everything a wallet has to do.
Besides that, MetaMask acts as a signer and a provider. As a provider, it connects to an Ethereum node and provides an interface to use its JSON-RPC API. As a signer, it provides an interface for secure transaction signing, thus it can be used to sign any transaction using a private key from the wallet.
Convenience Libraries
MetaMask, however, doesn’t provide much functionality: it can only manage accounts and send raw transactions. We need another library that will make interaction with contracts easy. We also want a set of utilities that will make our life easier when handling EVM-specific data (ABI encoding/decoding, big numbers handling, etc.).
There are multiple such libraries. The two most popular ones are: web3.js and ethers.js. Picking either of them is a matter of personal preference. To me, Ethers.js seems to have a cleaner contract interaction interface, so I’ll pick it.
Workflows
Let’s now see how we can implement interaction scenarios using MetaMask + Ethers.js.
Connecting to Local Node
To send transactions and fetch blockchain data, MetaMask connects to an Ethereum node. To interact with our contracts, we need to connect to the local Anvil node. To do this, open MetaMask, click on the list of networks, click “Add Network”, and add a network with RPC URL http://localhost:8545. It’ll automatically detect the chain ID (31337 in the case of Anvil).
After connecting to the local node, we need to import our private key. In MetaMask, click on the list of addresses, click “Import Account”, and paste the private key of the address you picked before deploying the contracts. After that, go to the assets list and import the addresses of the two tokens. Now you should see balances of the tokens in MetaMask.
MetaMask is still somewhat bugged. One problem I struggled with is that it caches the blockchain state when connected to
localhost. Because of this, when restarting the node, you might see old token balances and states. To fix this, go to the advanced settings and click “Reset Account”. You’ll need to do this each time after restarting the node.
Connecting to MetaMask
Not every website is allowed to get access to your address in MetaMask. A website first needs to connect to MetaMask. When a new website is connecting to MetaMask, you’ll see a window that asks for permissions.
Here’s how to connect to MetaMask from a front-end app:
// ui/src/contexts/MetaMask.js
const connect = () => {
  if (typeof (window.ethereum) === 'undefined') {
    return setStatus('not_installed');
  }

  Promise.all([
    window.ethereum.request({ method: 'eth_requestAccounts' }),
    window.ethereum.request({ method: 'eth_chainId' }),
  ]).then(function ([accounts, chainId]) {
    setAccount(accounts[0]);
    setChain(chainId);
    setStatus('connected');
  })
    .catch(function (error) {
      console.error(error)
    });
}
window.ethereum is an object provided by MetaMask, it’s the interface to communicate with MetaMask. If it’s undefined, MetaMask is not installed. If it’s defined, we can send two requests to MetaMask: eth_requestAccounts and eth_chainId. In fact, eth_requestAccounts connects a website to MetaMask. It queries an address from MetaMask, and MetaMask asks for permission from the user. The user will be able to choose which addresses to give access to.
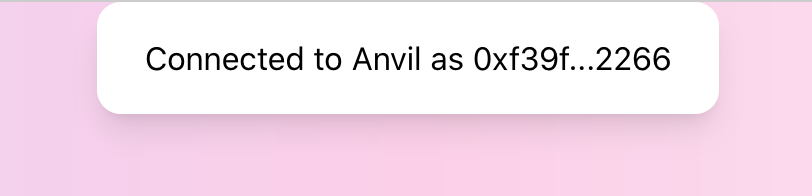
eth_chainId will ask for the chain ID of the node MetaMask is connected to. After obtaining an address and chain ID, it’s a good practice to display them in the interface:
Providing Liquidity
To provide liquidity into the pool, we need to build a form that asks the user to type the amounts they want to deposit. After clicking “Submit”, the app will build a transaction that calls mint in the manager contract and provides the amounts chosen by users. Let’s see how to do this.
Ether.js provides the Contract interface to interact with contracts. It makes our life much easier, since it takes on the job of encoding function parameters, creating a valid transaction, and handing it over to MetaMask. For us, calling contracts looks like calling asynchronous methods on a JS object.
Let’s see how to create an instance of Contracts:
token0 = new ethers.Contract(
  props.config.token0Address,
  props.config.ABIs.ERC20,
  new ethers.providers.Web3Provider(window.ethereum).getSigner()
);
A Contract instance is an address and the ABI of the contract deployed at this address. The ABI is needed to interact with the contract. The third parameter is the signer interface provided by MetaMask–it’s used by the JS contract instance to sign transactions via MetaMask.
Now, let’s add a function for adding liquidity to the pool:
const addLiquidity = (account, { token0, token1, manager }, { managerAddress, poolAddress }) => {
  const amount0 = ethers.utils.parseEther("0.998976618347425280");
  const amount1 = ethers.utils.parseEther("5000"); // 5000 USDC
  const lowerTick = 84222;
  const upperTick = 86129;
  const liquidity = ethers.BigNumber.from("1517882343751509868544");
  const extra = ethers.utils.defaultAbiCoder.encode(
    ["address", "address", "address"],
    [token0.address, token1.address, account]
  );
  ...
The first thing to do is to prepare the parameters. We use the same values we calculated earlier.
Next, we allow the manager contract to take our tokens. First, we check the current allowances:
Promise.all(
  [
    token0.allowance(account, managerAddress),
    token1.allowance(account, managerAddress)
  ]
)
Then, we check if either of them is enough to transfer a corresponding amount of tokens. If not, we’re sending an approve transaction, which asks the user to approve spending of a specific amount to the manager contract. After ensuring that the user has approved full amounts, we call manager.mint to add liquidity:
.then(([allowance0, allowance1]) => {
  return Promise.resolve()
    .then(() => {
      if (allowance0.lt(amount0)) {
        return token0.approve(managerAddress, amount0).then(tx => tx.wait())
      }
    })
    .then(() => {
      if (allowance1.lt(amount1)) {
        return token1.approve(managerAddress, amount1).then(tx => tx.wait())
      }
    })
    .then(() => {
      return manager.mint(poolAddress, lowerTick, upperTick, liquidity, extra)
        .then(tx => tx.wait())
    })
    .then(() => {
      alert('Liquidity added!');
    });
})
ltis a method of BigNumber. Ethers.js uses BigNumber to represent theuint256type, for which JavaScript doesn’t have enough precision. This is one of the reasons why we want a convenient library.
This is pretty much similar to the test contract, besides the allowances part.
token0, token1, and manager in the above code are instances of Contract. approve and mint are contract functions, which were generated dynamically from the ABIs we provided when instantiated the contracts. When calling these methods, Ethers.js:
- encodes function parameters;
- builds a transaction;
- passes the transaction to MetaMask and asks to sign it; the user sees a MetaMask window and presses “Confirm”;
- sends the transaction to the node MetaMask is connected to;
- returns a transaction object with full information about the sent transaction.
The transaction object also contains the wait function, which we call to wait for a transaction to be mined–this allows us to wait for a transaction to be successfully executed before sending another.
Ethereum requires a strict order of transactions. Remember the nonce? It’s an account-wide index of transactions, sent by this account. Every new transaction increases this index, and Ethereum won’t mine a transaction until a previous transaction (one with a smaller nonce) is mined.
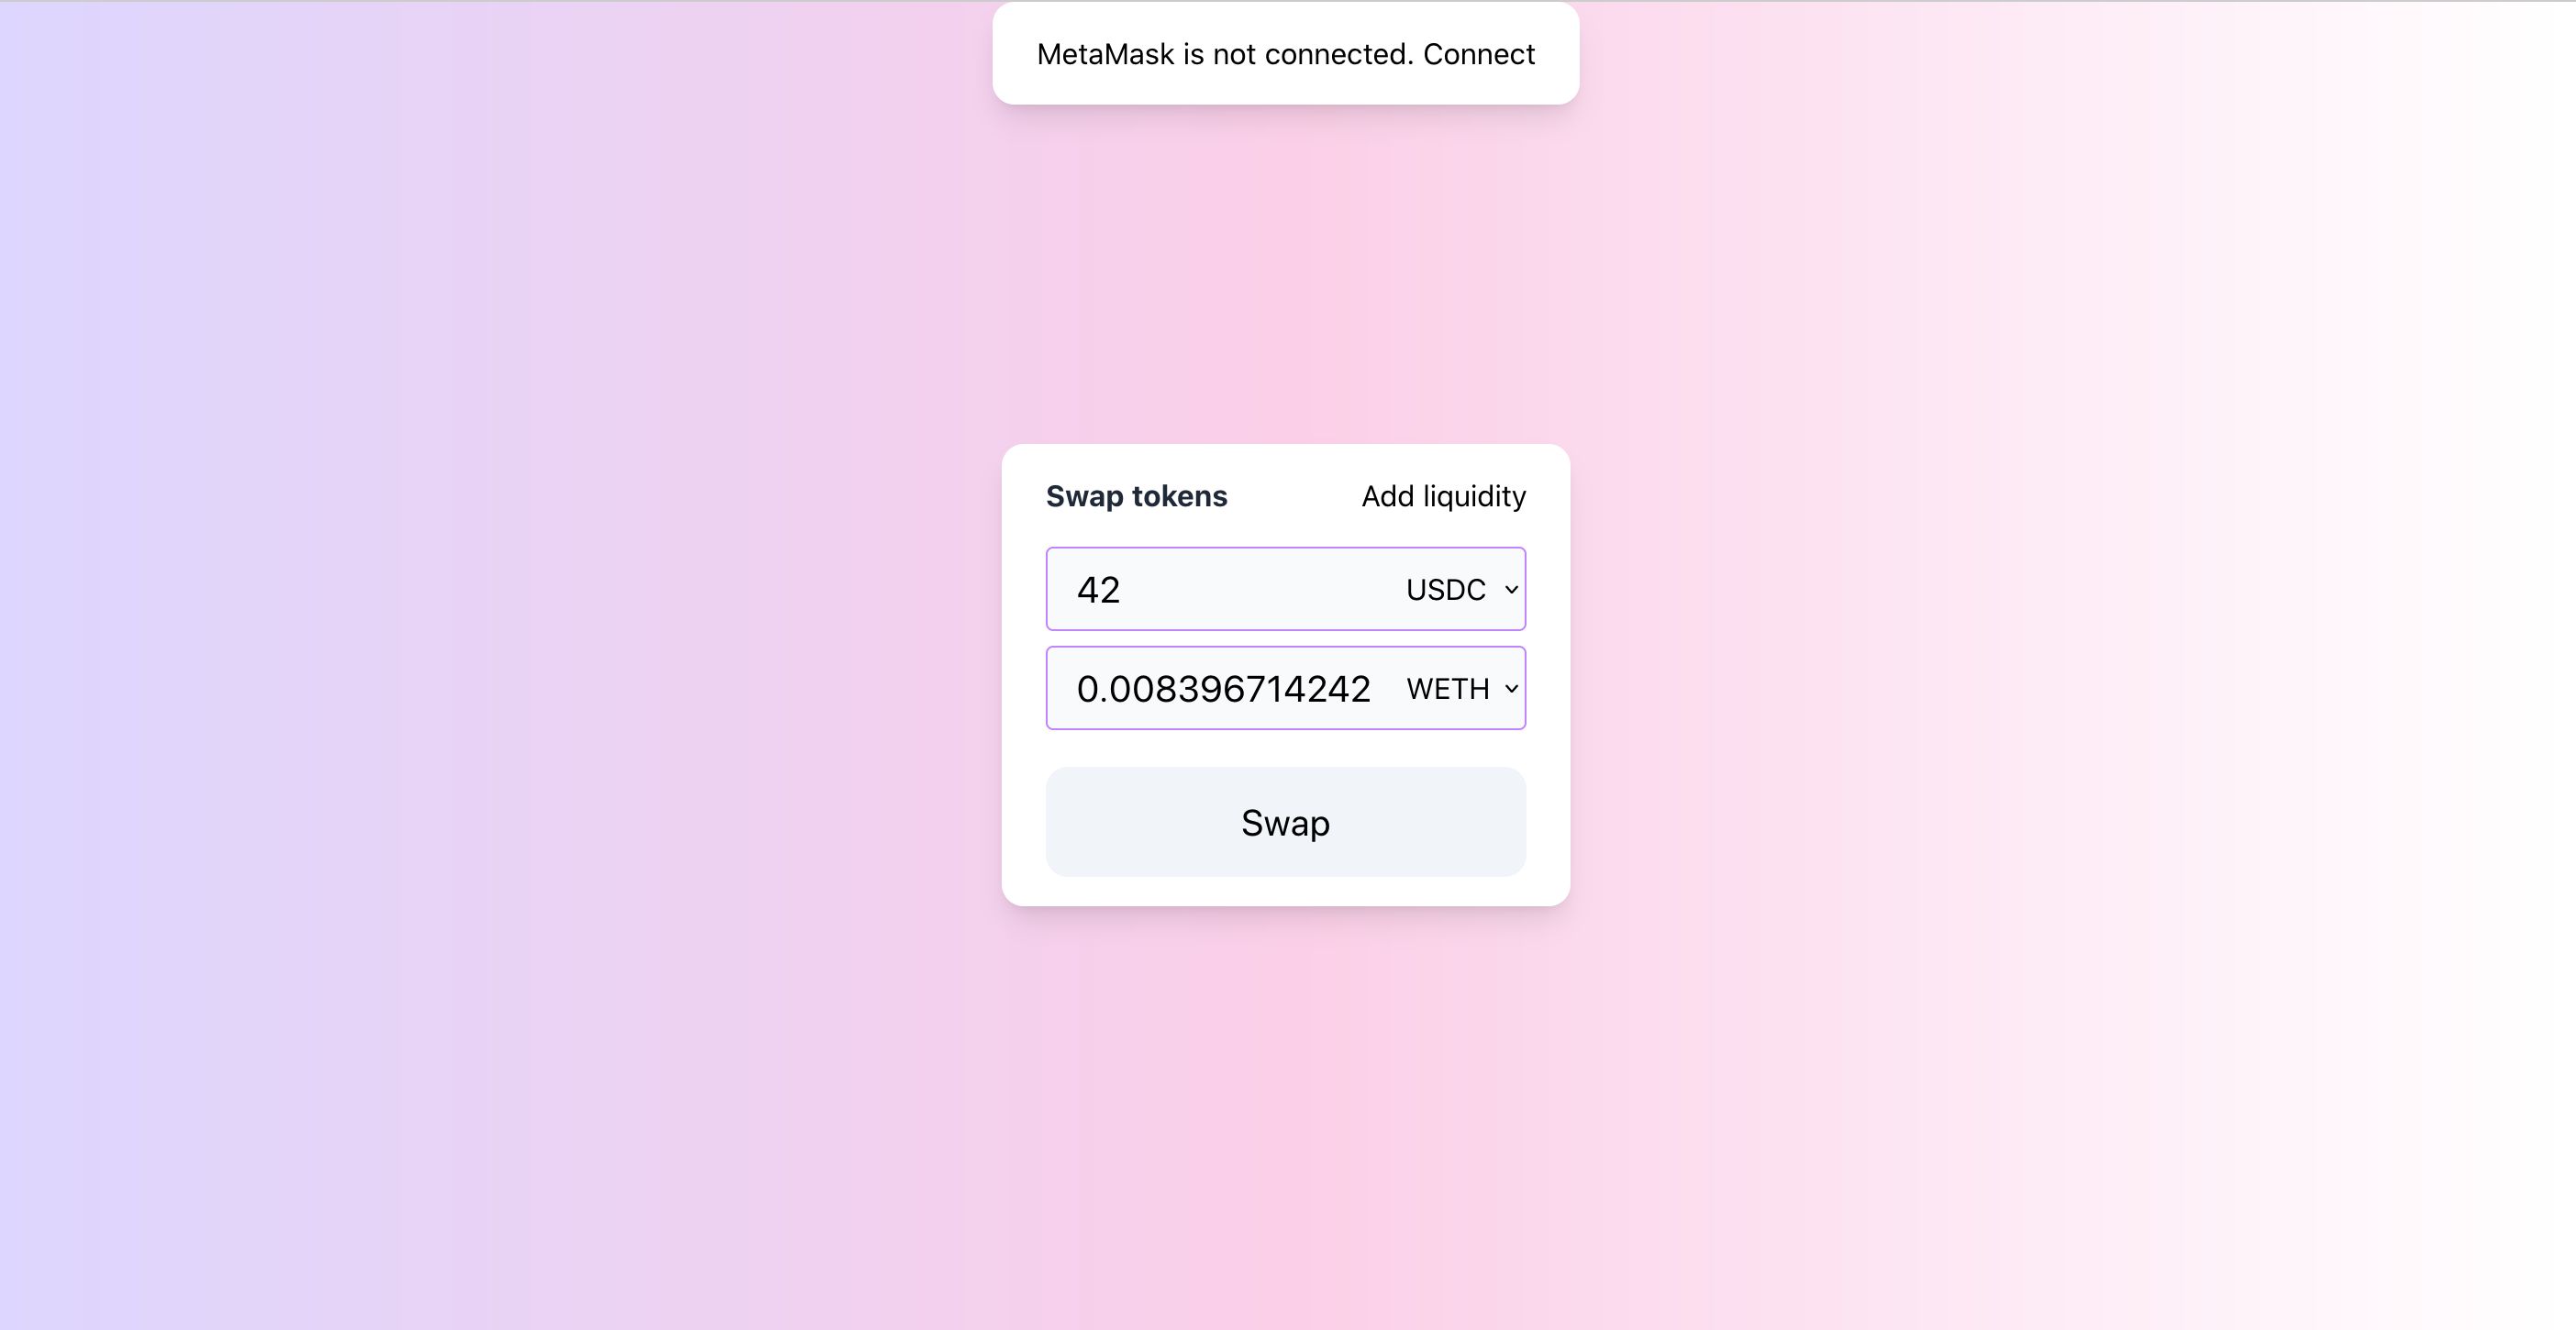
Swapping Tokens
To swap tokens, we use the same pattern: get parameters from the user, check allowance, and call swap on the manager.
const swap = (amountIn, account, { tokenIn, manager, token0, token1 }, { managerAddress, poolAddress }) => {
  const amountInWei = ethers.utils.parseEther(amountIn);
  const extra = ethers.utils.defaultAbiCoder.encode(
    ["address", "address", "address"],
    [token0.address, token1.address, account]
  );

  tokenIn.allowance(account, managerAddress)
    .then((allowance) => {
      if (allowance.lt(amountInWei)) {
        return tokenIn.approve(managerAddress, amountInWei).then(tx => tx.wait())
      }
    })
    .then(() => {
      return manager.swap(poolAddress, extra).then(tx => tx.wait())
    })
    .then(() => {
      alert('Swap succeeded!');
    }).catch((err) => {
      console.error(err);
      alert('Failed!');
    });
}
The only new thing here is the ethers.utils.parseEther() function, which we use to convert numbers to wei, the smallest unit in Ethereum.
Subscribing to Changes
For a decentralized application, it’s important to reflect the current blockchain state. For example, in the case of a decentralized exchange, it’s critical to properly calculate swap prices based on current pool reserves; outdated data can cause slippage and make a swap transaction fail.
While developing the pool contract, we learned about events, that act as blockchain data indexes: whenever a smart contract state is modified, it’s a good practice to emit an event since events are indexed for quick search. What we’re going to do now, is to subscribe to contract events to keep our front-end app updated. Let’s build an event feed!
If you checked the ABI file as I recommended earlier, you saw that it also contains the description of events: event name and its fields. Well, Ether.js parses them and provides an interface to subscribe to new events. Let’s see how this works.
To subscribe to events, we’ll use the on(EVENT_NAME, handler) function. The callback receives all the fields of the event and the event itself as parameters:
const subscribeToEvents = (pool, callback) => {
  pool.on("Mint", (sender, owner, tickLower, tickUpper, amount, amount0, amount1, event) => callback(event));
  pool.on("Swap", (sender, recipient, amount0, amount1, sqrtPriceX96, liquidity, tick, event) => callback(event));
}
To filter and fetch previous events, we can use queryFilter:
Promise.all([
  pool.queryFilter("Mint", "earliest", "latest"),
  pool.queryFilter("Swap", "earliest", "latest"),
]).then(([mints, swaps]) => {
  ...
});
You probably noticed that some event fields are marked as indexed–such fields are indexed by Ethereum nodes, which lets search events by specific values in such fields. For example, the Swap event has sender and recipient fields indexed, so we can search by swap sender and recipient. And again, Ethere.js makes this easier:
const swapFilter = pool.filters.Swap(sender, recipient);
const swaps = await pool.queryFilter(swapFilter, fromBlock, toBlock);
And that’s it! We’re done with Milestone 1!
🎉🍾🍾🍾🎉